| Choice of blades (2): |
26 mm diameter for all thin surfaces up to 3 mm |
| |
40 mm diameter for all surfaces thicker than 3 mm |
| |
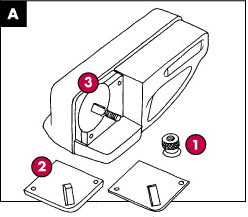
A. Changing the blade
- Remove screw (1) and distance plates (2)
- Turn blade (3) 180° or replace blade and reassemble
|
 |
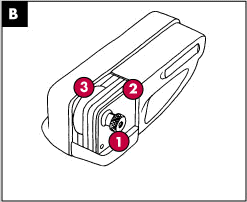
B. Adjust cutting width
- Remove screw (1) and distance plates (2)
- Place blade (3) between the selected distance plates (2) and reassemble. You have 22 choices between 0 - 27 mm
|
|
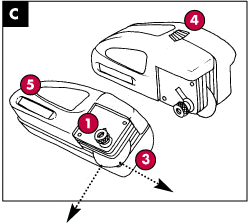
C. Adjust cutting depth (infinitely
variable up to 13 mm)
- Release screw (2)
- Adjust blade position by turning wheel (4) and check blade depth with a ruler
- Fasten screw (1)
- Blade storage space (5)
|
 |
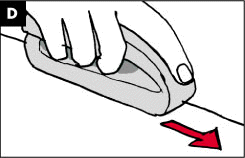
D. Using PROVINOL
- Please hold PROVINOL by gripping the soft touch material areas and then push firmly in the required direction using the heel of your palm
|
|
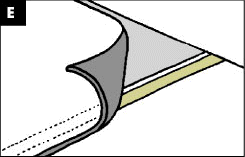
E. Fixing edges
together
- Before starting to cut, fix edges together with double-sided tape to avoid material moving out of place
|
|
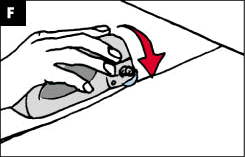
F. Cutting with PROVINOL
- Start away from the wall
- Line up the PROVINOL guidance edge with the seam
|
|
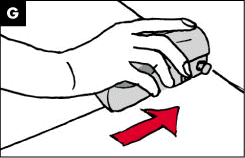
G. Cut the first 20 cm by pushing
backwards |
|
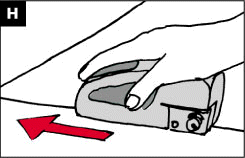
H.
Continue cutting pushing forwards
until the opposite wall is reached |
 |
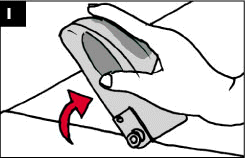
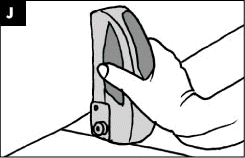
I - J. Turn PROVINOL 90° to cut the remaining distance
|
|
|
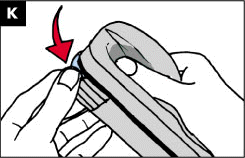
K. Please work safely and take care!
- PROVINOL blades are extremely sharp!
- Please retract blade into the PROVINOL body after use!
|
 |
| |
|
New:
Watch our new movie
Operation manual!
Due to the size of the movie (31 MB)
there might be a little time to wait while
the first loading. Nevertheless it's worth to be seen ... |
 |
Our service for you: the complete operating instructions and
ranges of use to download! |
- Click here and print the instructions for yourself:
|
 |
|
In case you should not e able to open the document, you first need the "Adobe Acrobat reader".
You may download it here: |
 |
|

